Fellowship Programme 2023 Application Video Guide
Fellowship Programme 2023 Application Video Guide
This guide is intended to help you produce your application video for the Fellowship Programme.
You can also read the Institute's general Guide on Recording Screencasts, Online Training and Events and Live Streaming here and watch the screencast applications from some of our Fellows submitted during the 2018, 2020, 2021 and 2022 rounds for inspiration.
Table of Contents
Screencast Content
We are looking for a 6-minute long (maximum) voice-over slide presentation screencast. In your presentation you must address who you are professionally, what you do and what your plans are for the Fellowship. The content of your slides should be professional and the style of your slides should be suitable for assessment in a research and development environment. There are no restrictions on the number of slides you use. Find some tips on how to make a great screencast application for our Fellowship Programme below.
Tip #1: Outline your plan
During shortlisting, applicants are assessed on Ambassadorship (30%) and their Fellowship Plans (70%); you can view the Shortlisting Criteria here. We therefore recommend spending most of the time describing your plans for the Fellowship - specifically how will the Fellowship help you achieve your goals?
A suggested format for your screencast is:
- Who you are professionally (1 minute suggested)
- What you do (1 minute suggested)
- Your plans for the Fellowship (4 minutes suggested)
You may decide to spend more time on any section but your video application must be six minutes or less in total.
When presenting about who you are professionally, keep in mind that the reviewers may not be from your research domain. We have librarians, software developers, mathematicians, biologists, physicists, criminologists and many other domains represented by our reviewers, and some terms that might be familiar to a first-year PhD student in your field may be completely new to your reviewer so we recommend avoiding jargon. When presenting about what you do, try to turn it into a narrative that connects to your plans for the Fellowship. How do you advocate for better research practice in your domain?
With regards to your plans for the Fellowship, the Institute is very interested in supporting work that builds on previous efforts in a strategic area and/or helps nurture and grow communities of practice. Examples of this are Coding Club and Open Life Science. However, we also support novel work and new areas, such as Mental Health in Research Software Engineering.
It is not only about having the right plan. Plans should include details around how the Fellowship will be leveraged to achieve your goals, such as specificity around activities, costs, and target domain, community or audience. Reviewers will pay attention to any experience you have on delivering plans. For example, if you plan to organise a Carpentries-style workshop as part of your Fellowship, you will probably have experience organising training sessions or workshops, or an idea on how you plan to acquire the skills needed for this such as through Instructor Training. If your plan is the first of its kind, reviewers will be interested in seeing that you have a clear vision for outputs and outcomes, such as a series of blog posts or a new resource. But don’t worry, we will take your career stage into consideration when assessing your plans and previous experience.
Tip #2: Good audio quality
It can be difficult for reviewers to understand you if the quality of the audio on your recording is not clear. You do not need to use a studio microphone for your screencast, but following some good practices will help you save time and have a great recording to submit.
First, find a quiet room where you will not be disturbed and switch off all notifications - you do not want to be interrupted in the middle of your recording. Conduct sound tests before doing the full recording, and try different microphones as they can vary greatly in quality. We advise applicants to use the microphone from a USB headset as the audio capture is usually good and some have noise cancelling capabilities.
If you have finished your full recording and think that the audio has too much background noise or your voice isn't loud enough, you can use software such as Audacity to reduce the background noise and make your voice louder and clearer.
You can read our Top tips for online presentations and our Guide on Recording Screencasts, Online Training and Events and Live Streaming for more advice on testing and editing audio and video recordings.
Tip #3: Number of slides
Think carefully about having too many slides in your presentation. The key to choosing the number of slides is to avoid a situation where moving to the next slide would not give reviewers enough time to read the content. Stopping the video or rewinding it a few seconds on each slide is something that reviewers will not have time to do.
Screencast Tools
You can use any screencast tool available for your operating system (see Wikipedia for a list of examples). We recommend Open Broadcaster Software (OBS) Studio because it works on Windows, macOS and GNU/Linux and is free and open source. Zoom is also a great tool for recording video presentations, which you can do with a free account.
Open Broadcaster Software Studio
Instructions to download and install are available at https://obsproject.com/download.
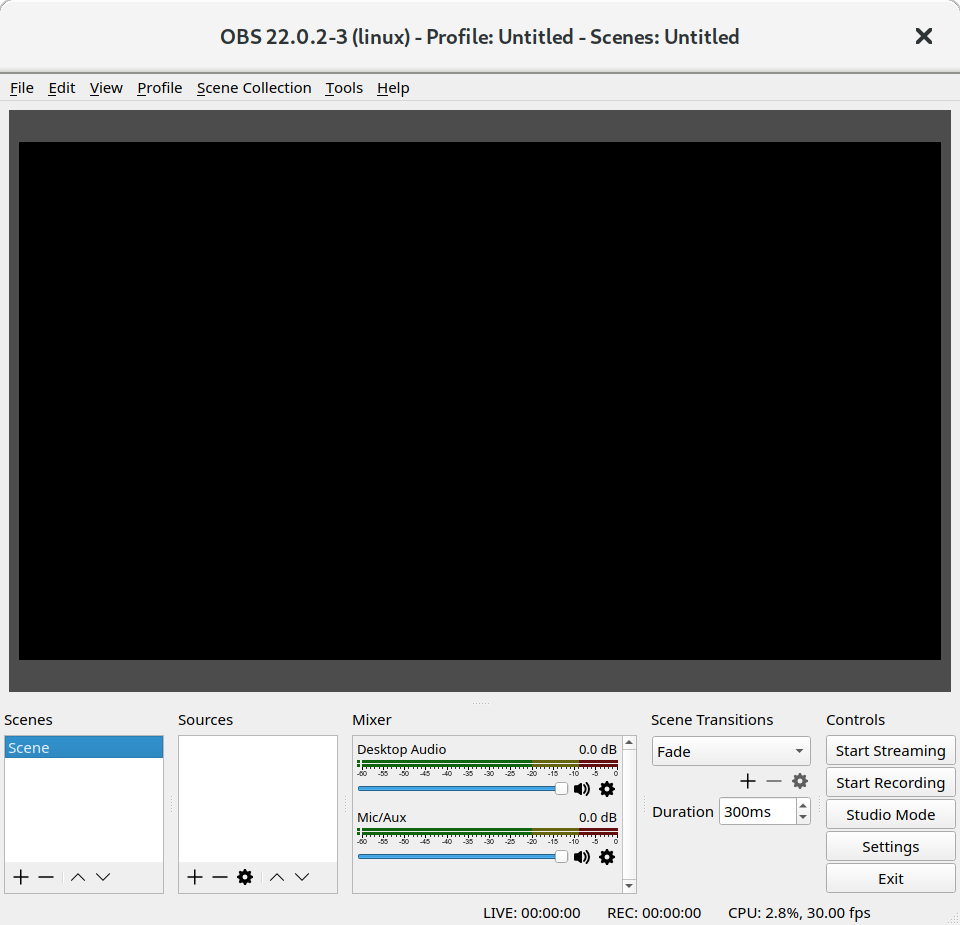
The first time that you launch OBS Studio, you will need to agree with the GNU General Public License Version 2 and opt-in to run the auto-configuration wizard. Before recording your video, you can configure where the video will be stored.
In the menu bar, select "Files" and "Settings".
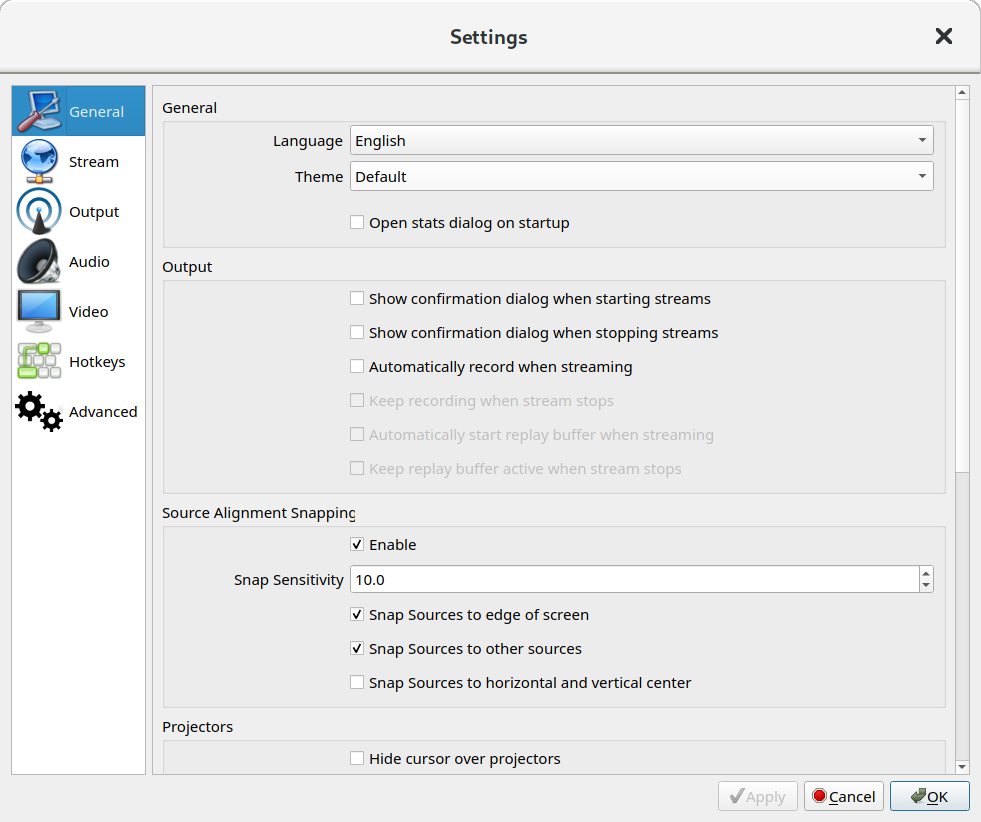
In the left sidebar, select "Output".
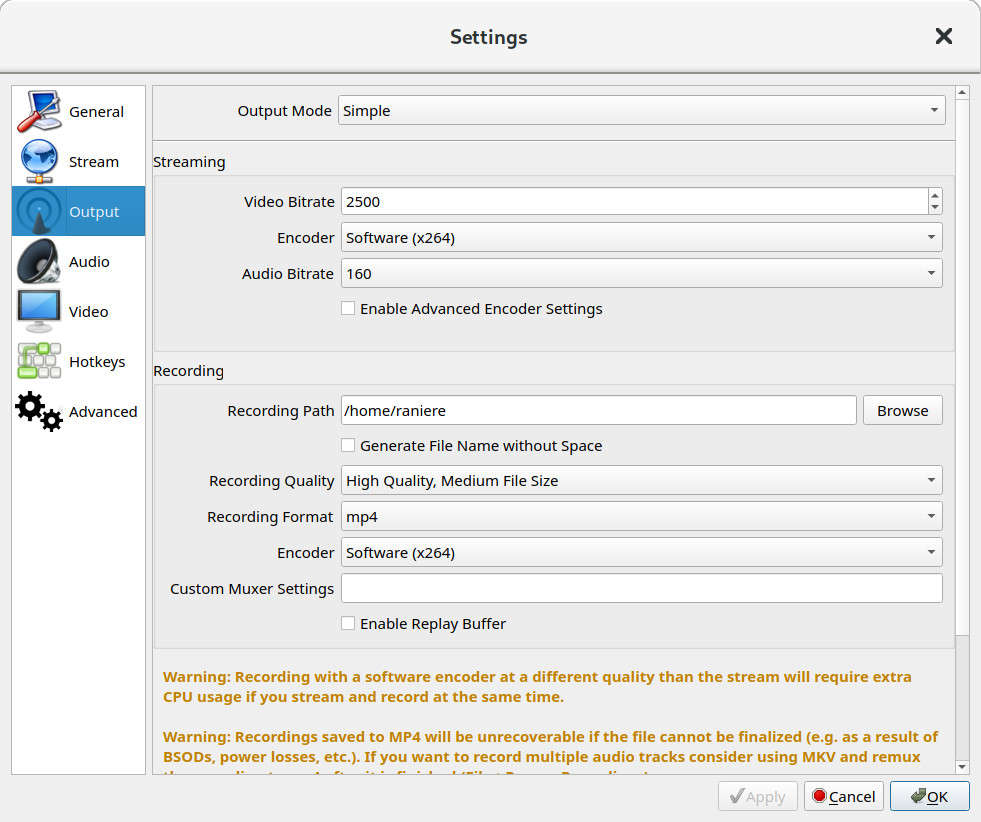
Under the "Recording" options, configure the "Recording Path" for where OBS Studio should save your video and select "mp4" as the "Recording Format". At the bottom right, click on "OK".
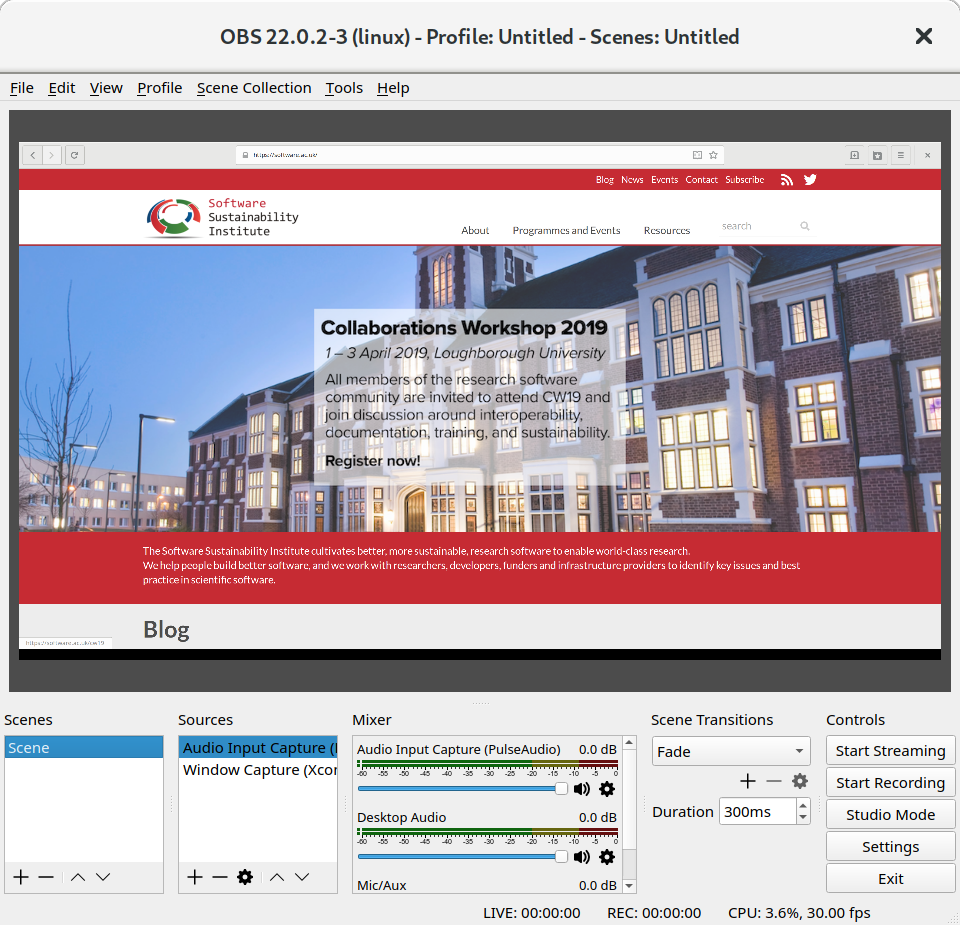
Back in OBS Studio, you need to add the "Sources" (second column from left to right, look for the "+" button). Add "Window Capture" and "Audio Input Capture".
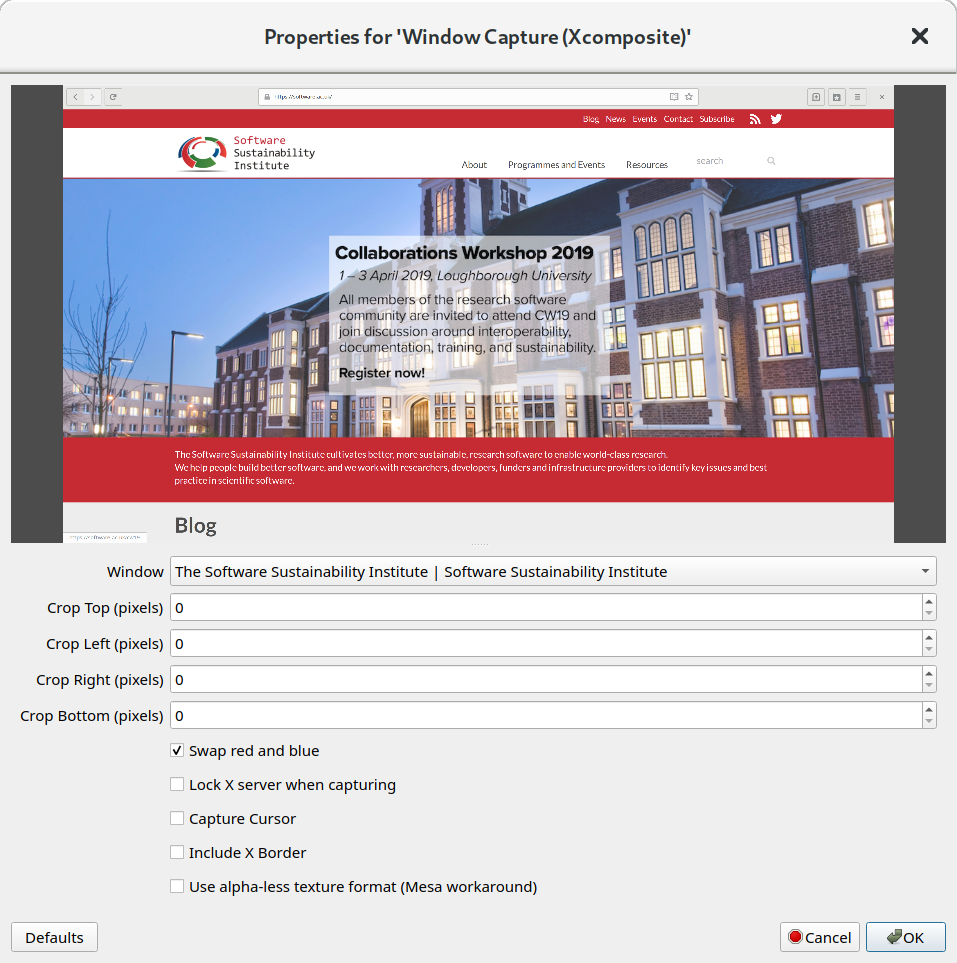
When adding the "Window Capture" you need to select which window you want to record. If you want, you can disable the "Capture Cursor". In some cases, the red and blue are swapped - you will notice on the preview. If this happens, you should enable "Swap red and blue".
When adding "Audio Input Capture", you need to select the device you want to capture. We recommend using an external microphone for better audio capture.
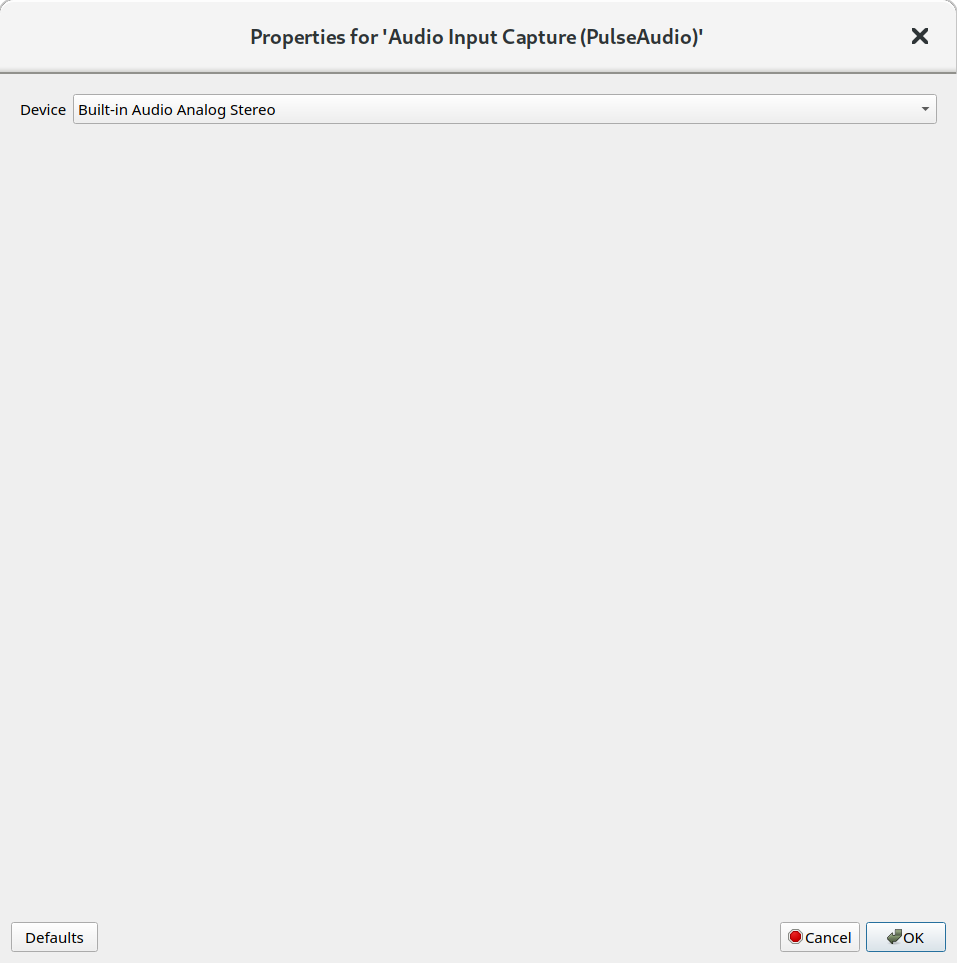
If you need to change the "Sources" properties, you can double click on the source to change it.
To start recording your video, click on the "Start Recording" button.
When the record starts, you will see the clock on the bottom change and there will be a button to "Stop Recording".
The last step is to check your video. Is the audio clear and loud enough?
Zoom
- Download and install the Zoom Client for Meetings.
- Open the Zoom app and click on “New Meeting”.

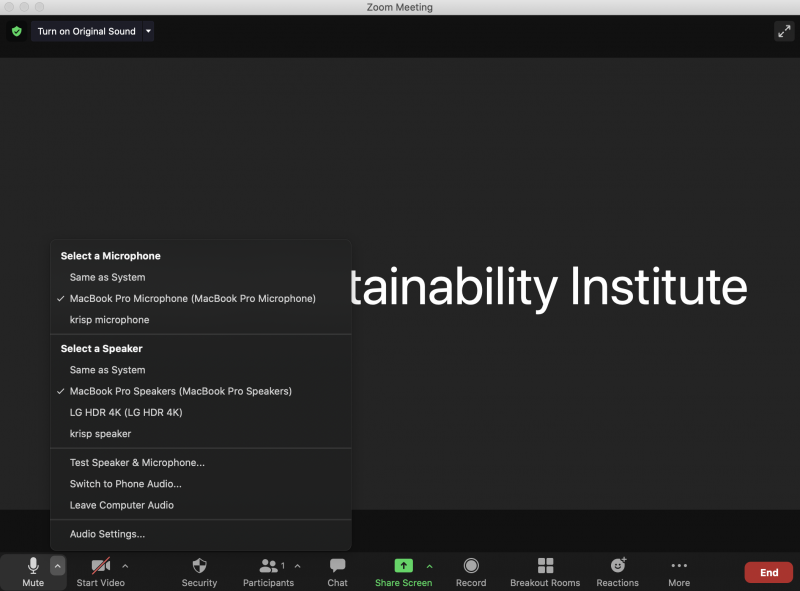
- In the meeting controls, make sure that your microphone is unmuted and click on the arrow (^) to make sure that the correct microphone is selected. We recommend using an external microphone for better audio capture. You can test your computer or device audio following these instructions.
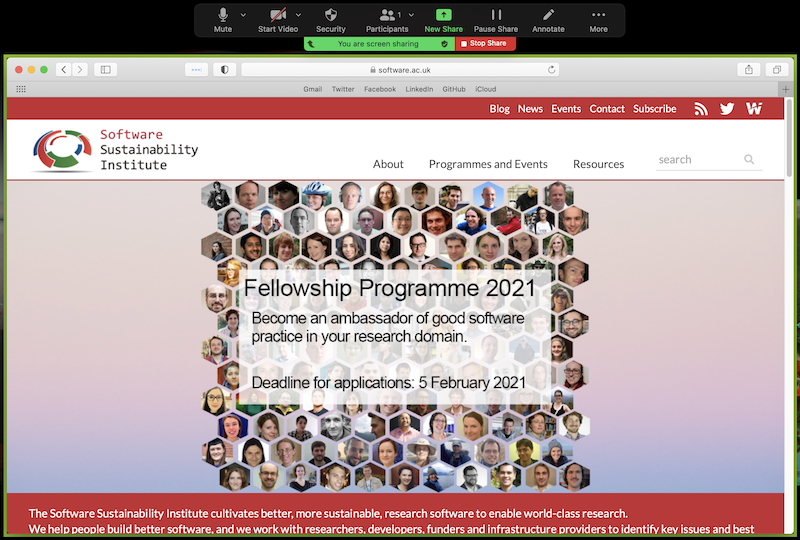
- Next, click “Share Screen” in the meeting controls. In the share window, select the window you wish to use in the recording (your slide show, see these instructions for Screen sharing a PowerPoint presentation).
- If your presentation slides include sound, check the box for “Share computer sound”.
- If your presentation slides include video, check the box for “Optimize Screen Share for Video Clip”.
- Click the “Share” button. The window that is being shared/recorded will now have a green outline and the meeting controls will move to the top of the screen.
- To begin recording, click “... More” in the meeting controls at the top of the screen and select “Record on this Computer” (or “Record to the Cloud” if you prefer for the recording to be saved to your Zoom account).
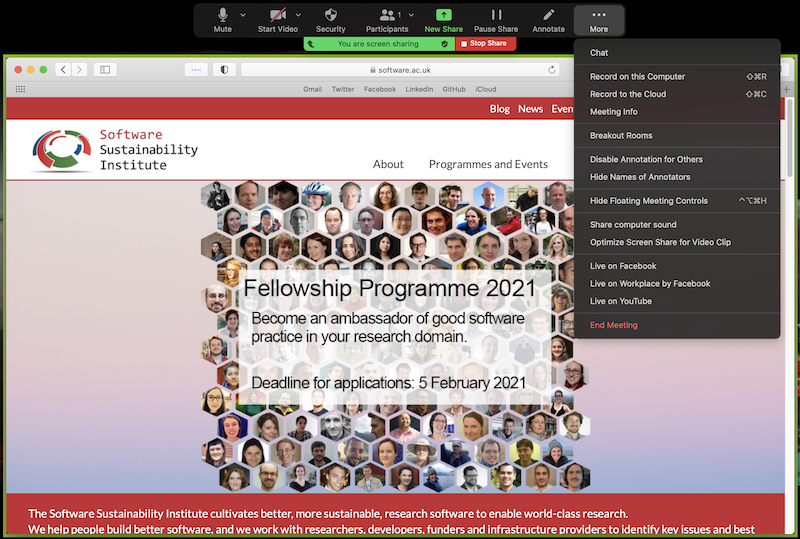
- You are now recording and can start giving your voice-over. You can pause the recording by clicking “... More” in the meeting controls and selecting “Pause Recording”.
- When you are finished with your voice-over, click “... More” in the meeting controls and select “Stop Recording”. Then click the red “Stop Share” button.
- Click “End Meeting” and then “End Meeting for All” to exit Zoom. Once you have exited the app, your video will begin processing (locally if you selected “Record on this Computer”, or in the cloud if you selected “Record to the Cloud”).
- The last step is to check your video. Is the audio clear and loud enough?
Video Hosting
You can host your video anywhere that you prefer as long as we can download it by using the URL that you provide on your application form. Below you will find instructions on hosting your video on Google Drive or Dropbox.
Google Drive
Access https://www.google.com/.
Log in with your Google Account.
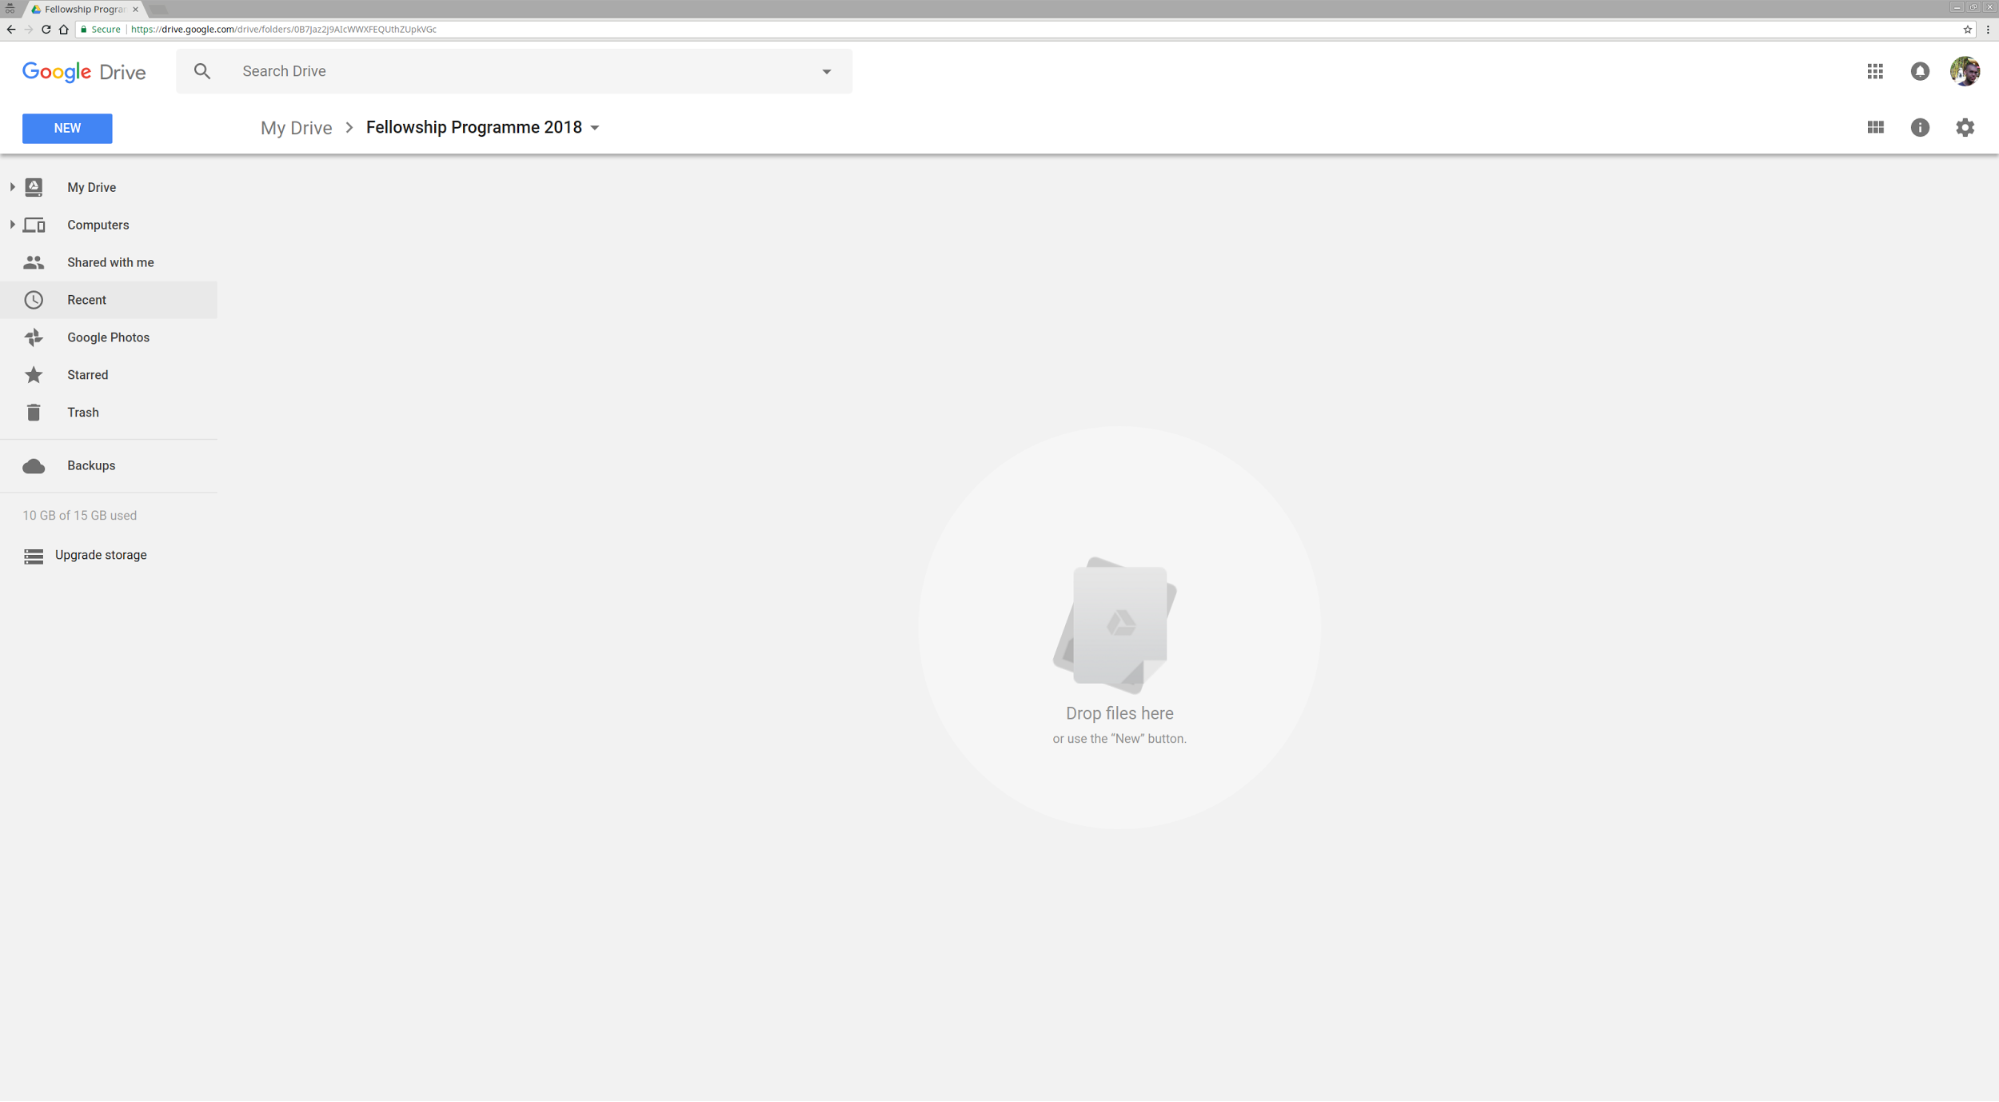
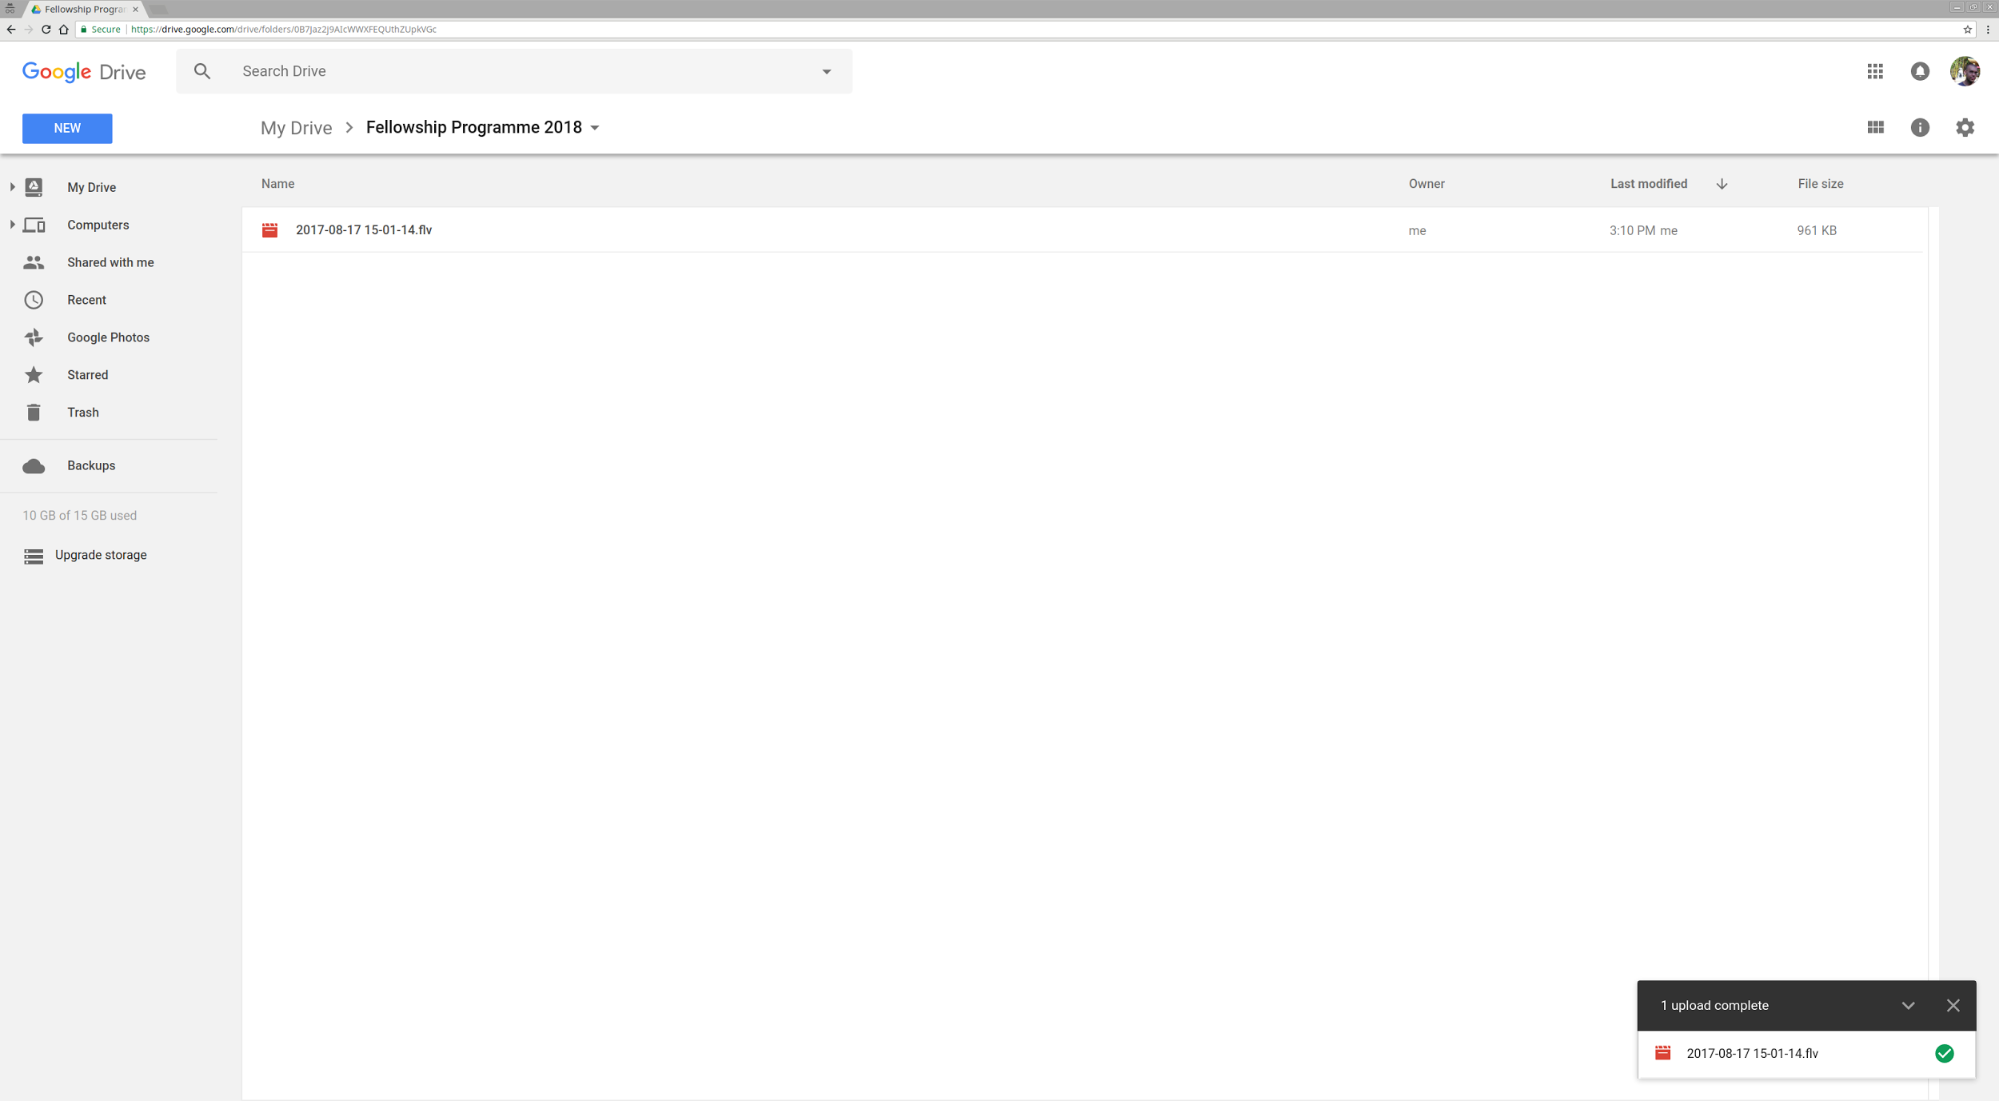
On the left side, select "New" and "File Upload". A window will open so that you can select the file you want to upload.
Select the file that you want to upload with a left click and open the option menu with a right click.
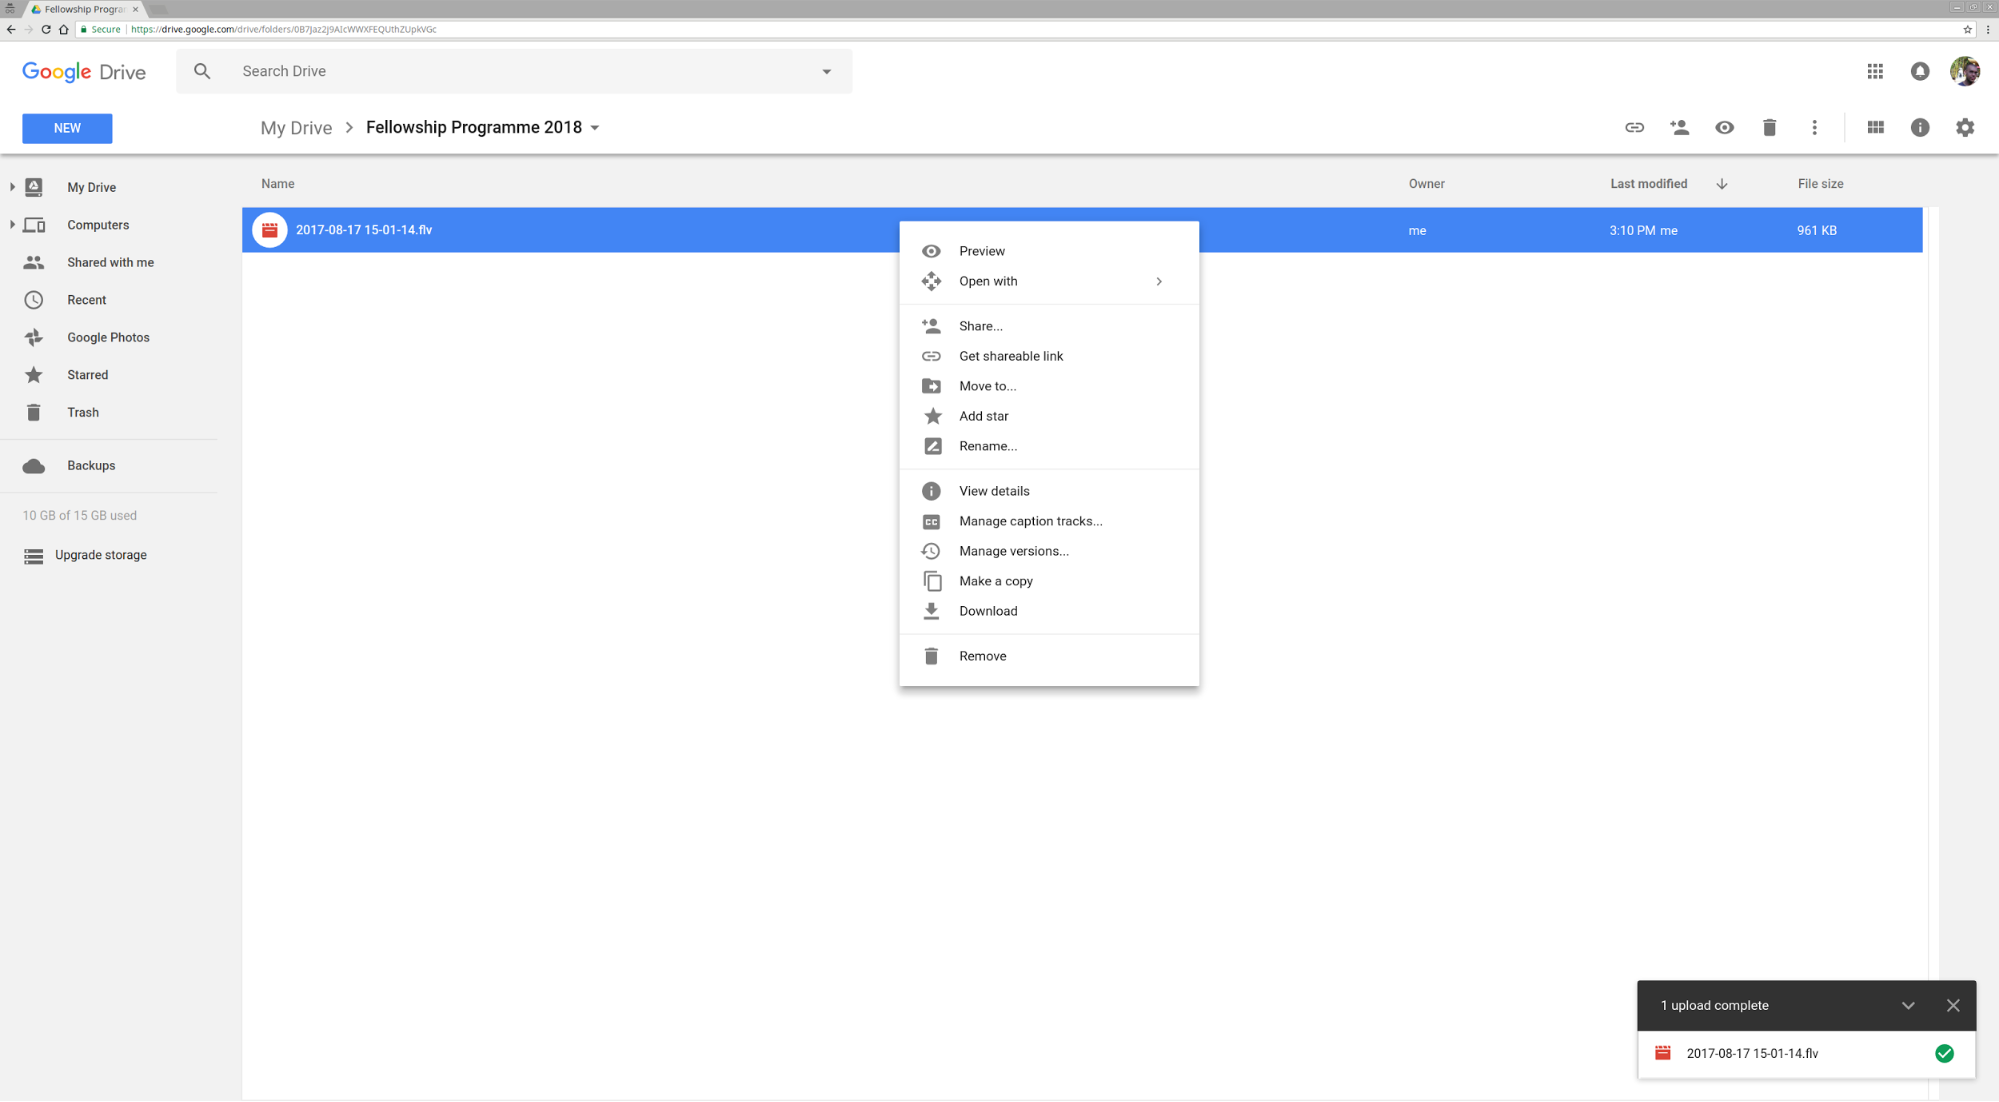
Select "Get shareable link". A balloon will show on the screen.
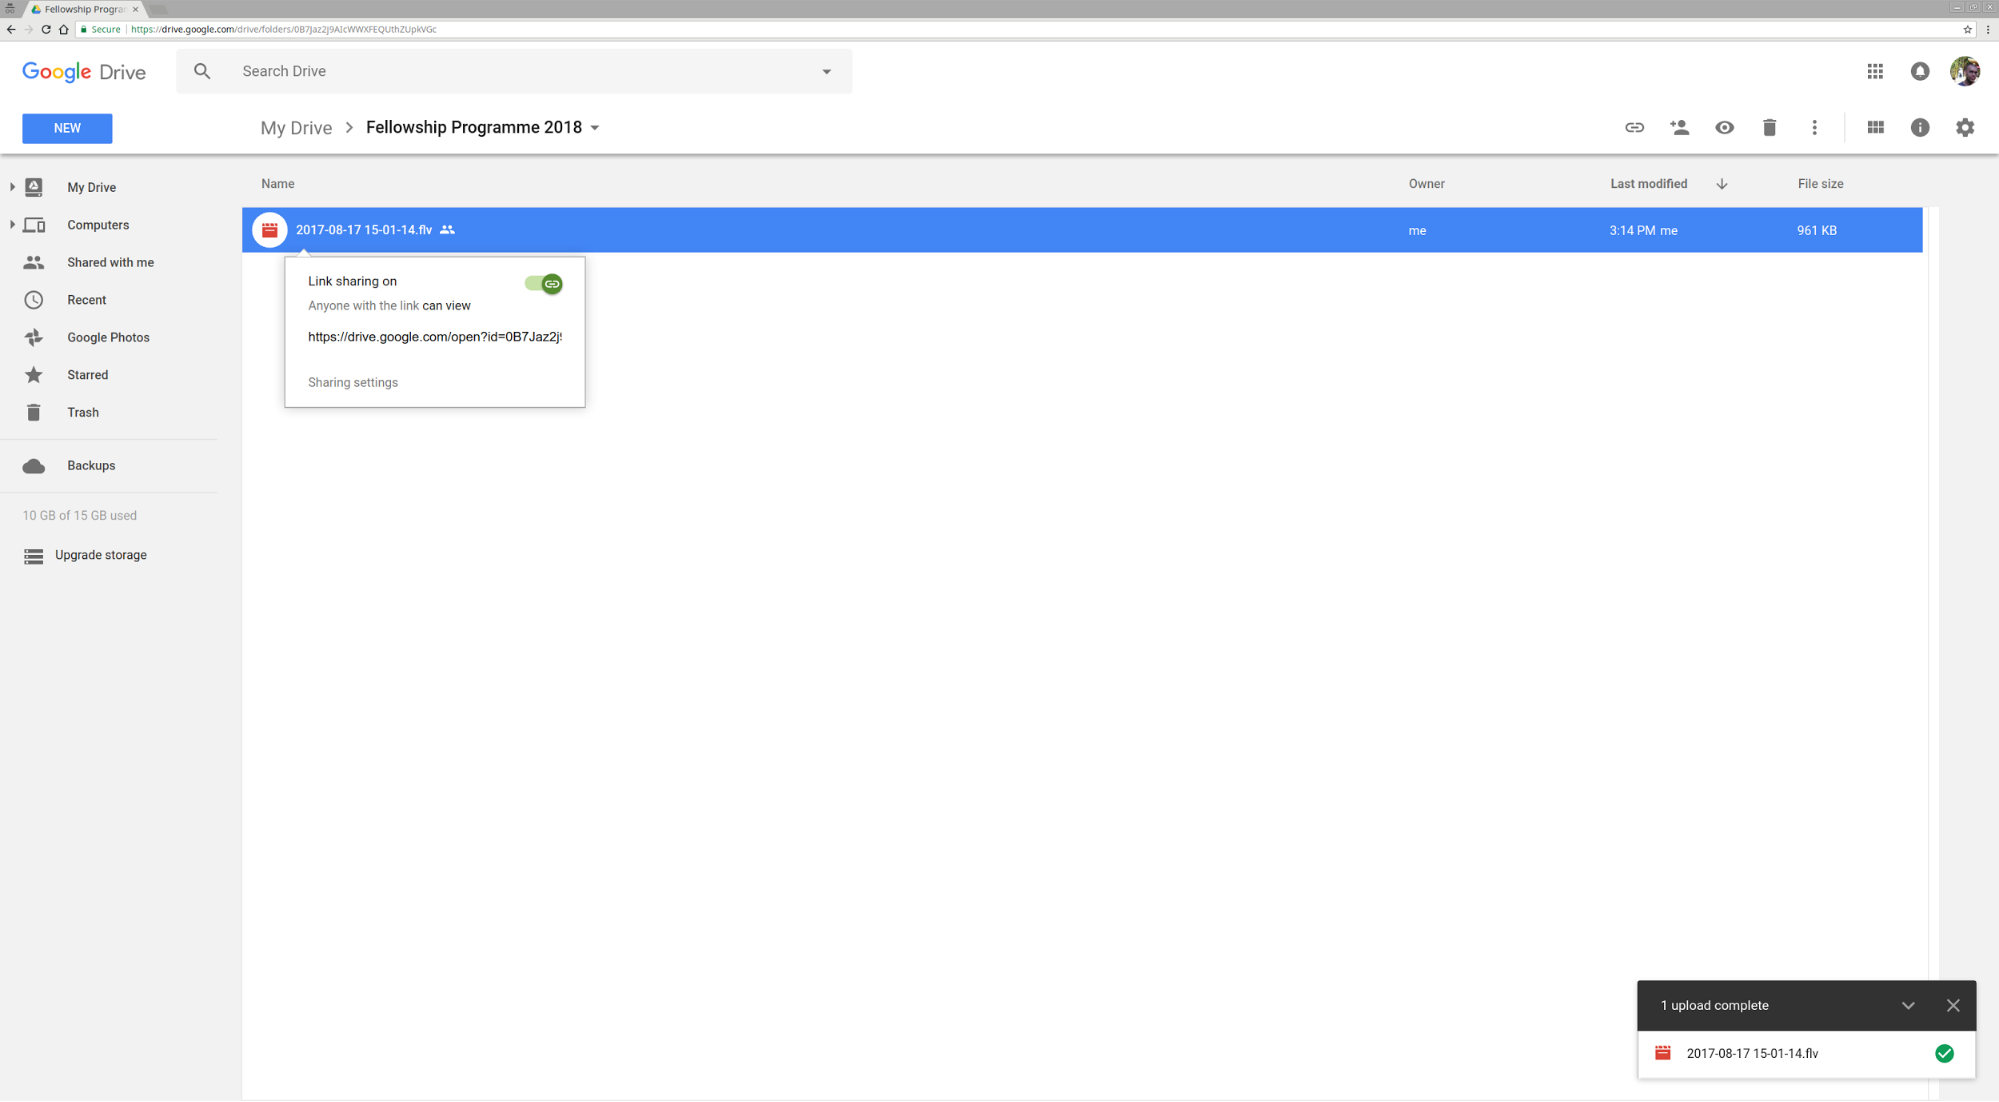
Copy the link provided on the balloon and paste on your application.
Note: We will change the link from https://drive.google.com/file/d/FILE_ID/edit?usp=sharing to https://drive.google.com/uc?export=download&id=FILE_ID so that curl can download your video.
Dropbox
Access https://www.dropbox.com/home.
Log in with your Dropbox Account.
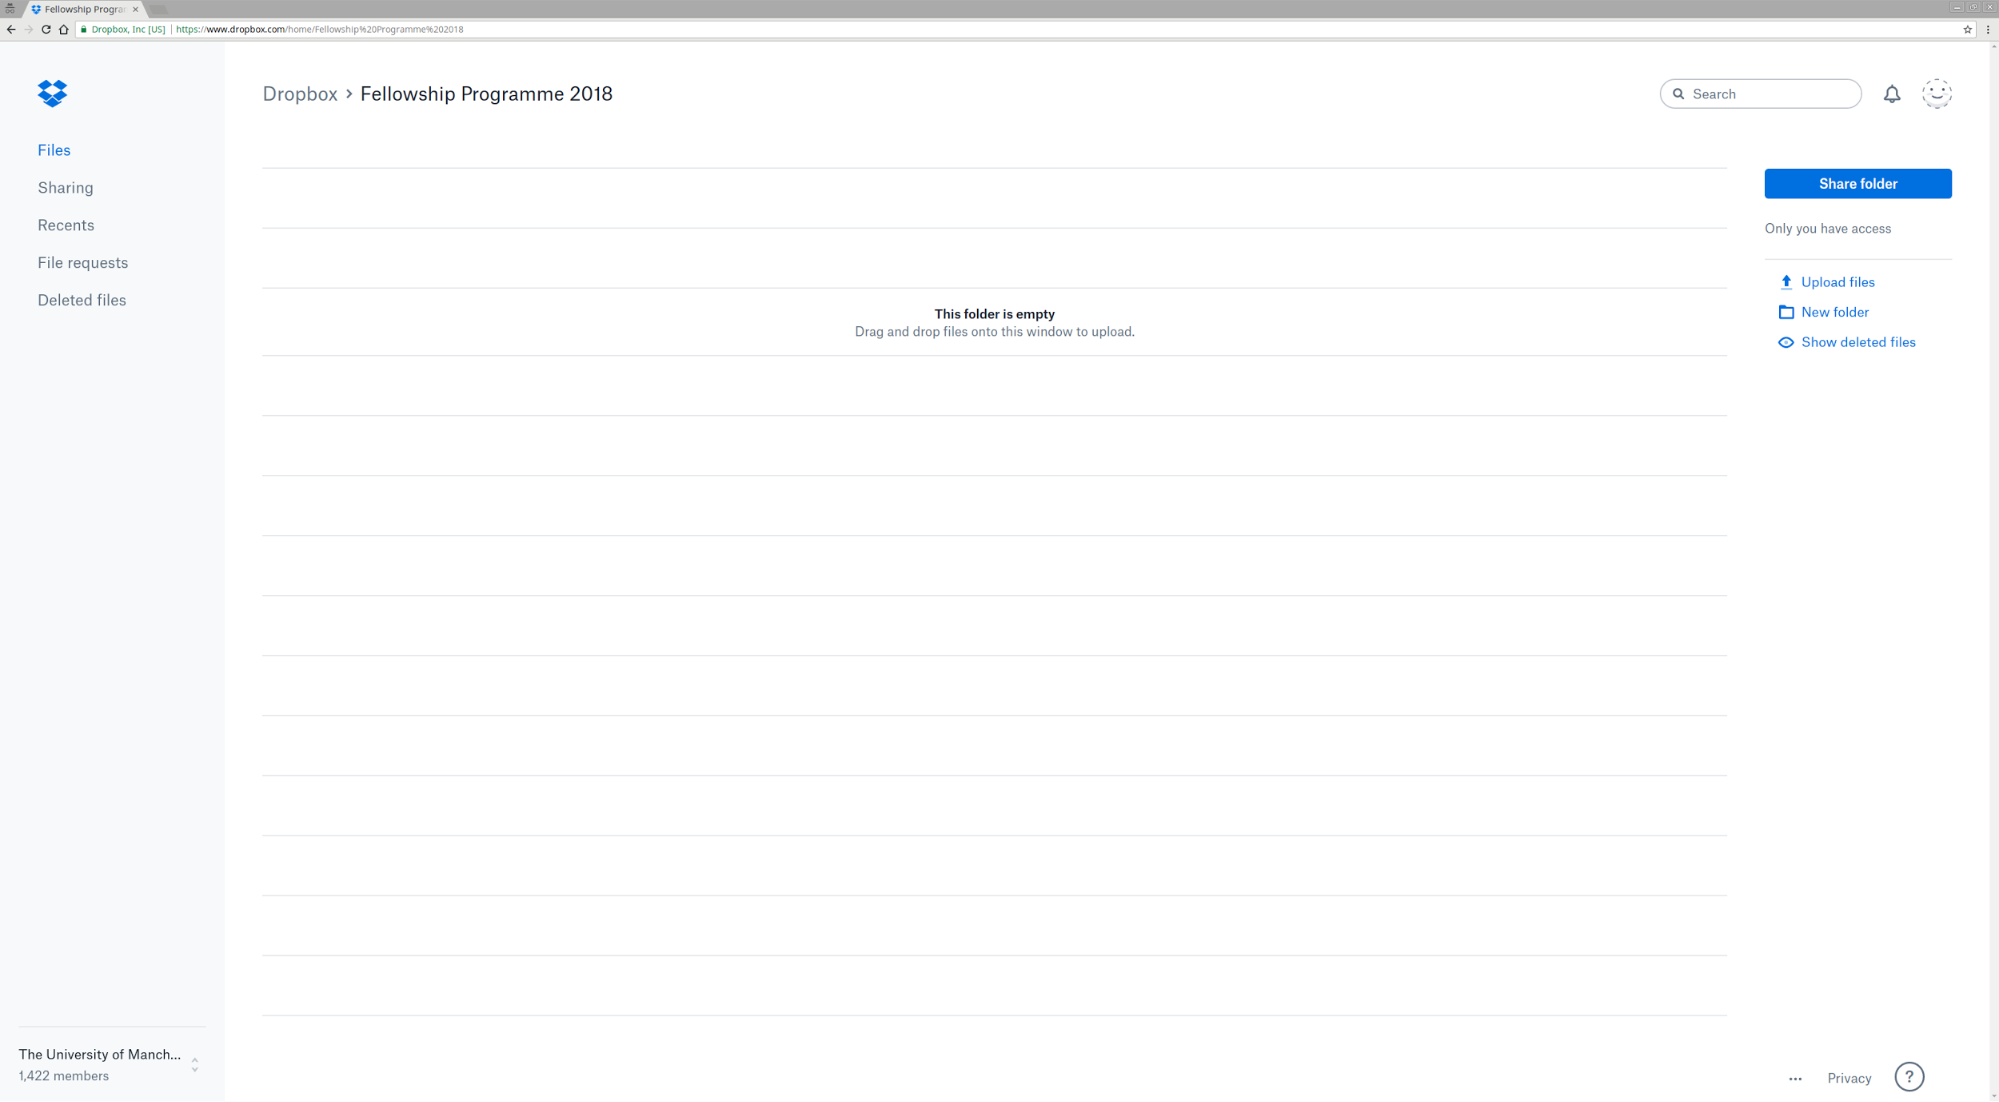
On the right side, click on "Upload file". A window will open so that you can select the file you want to upload.
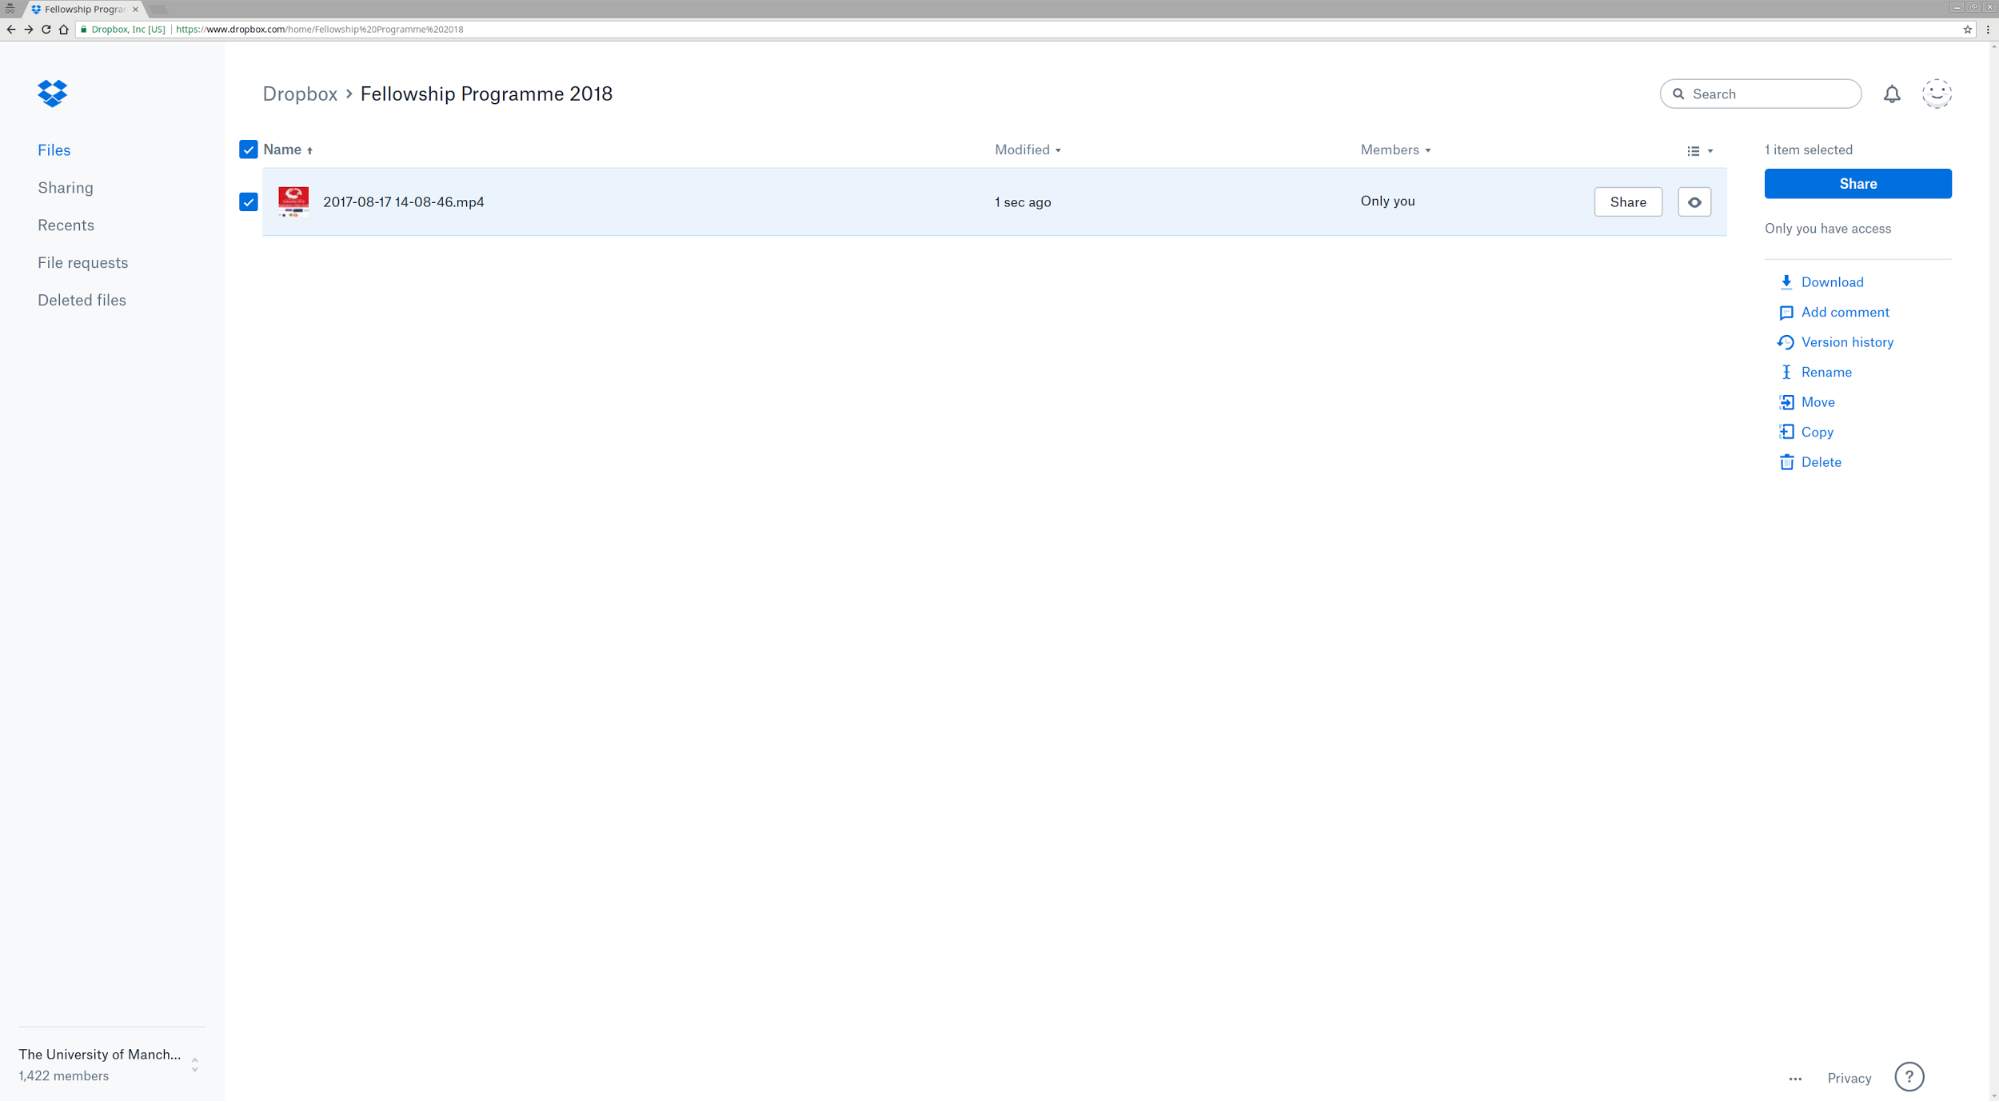
Click on the "Share" button.
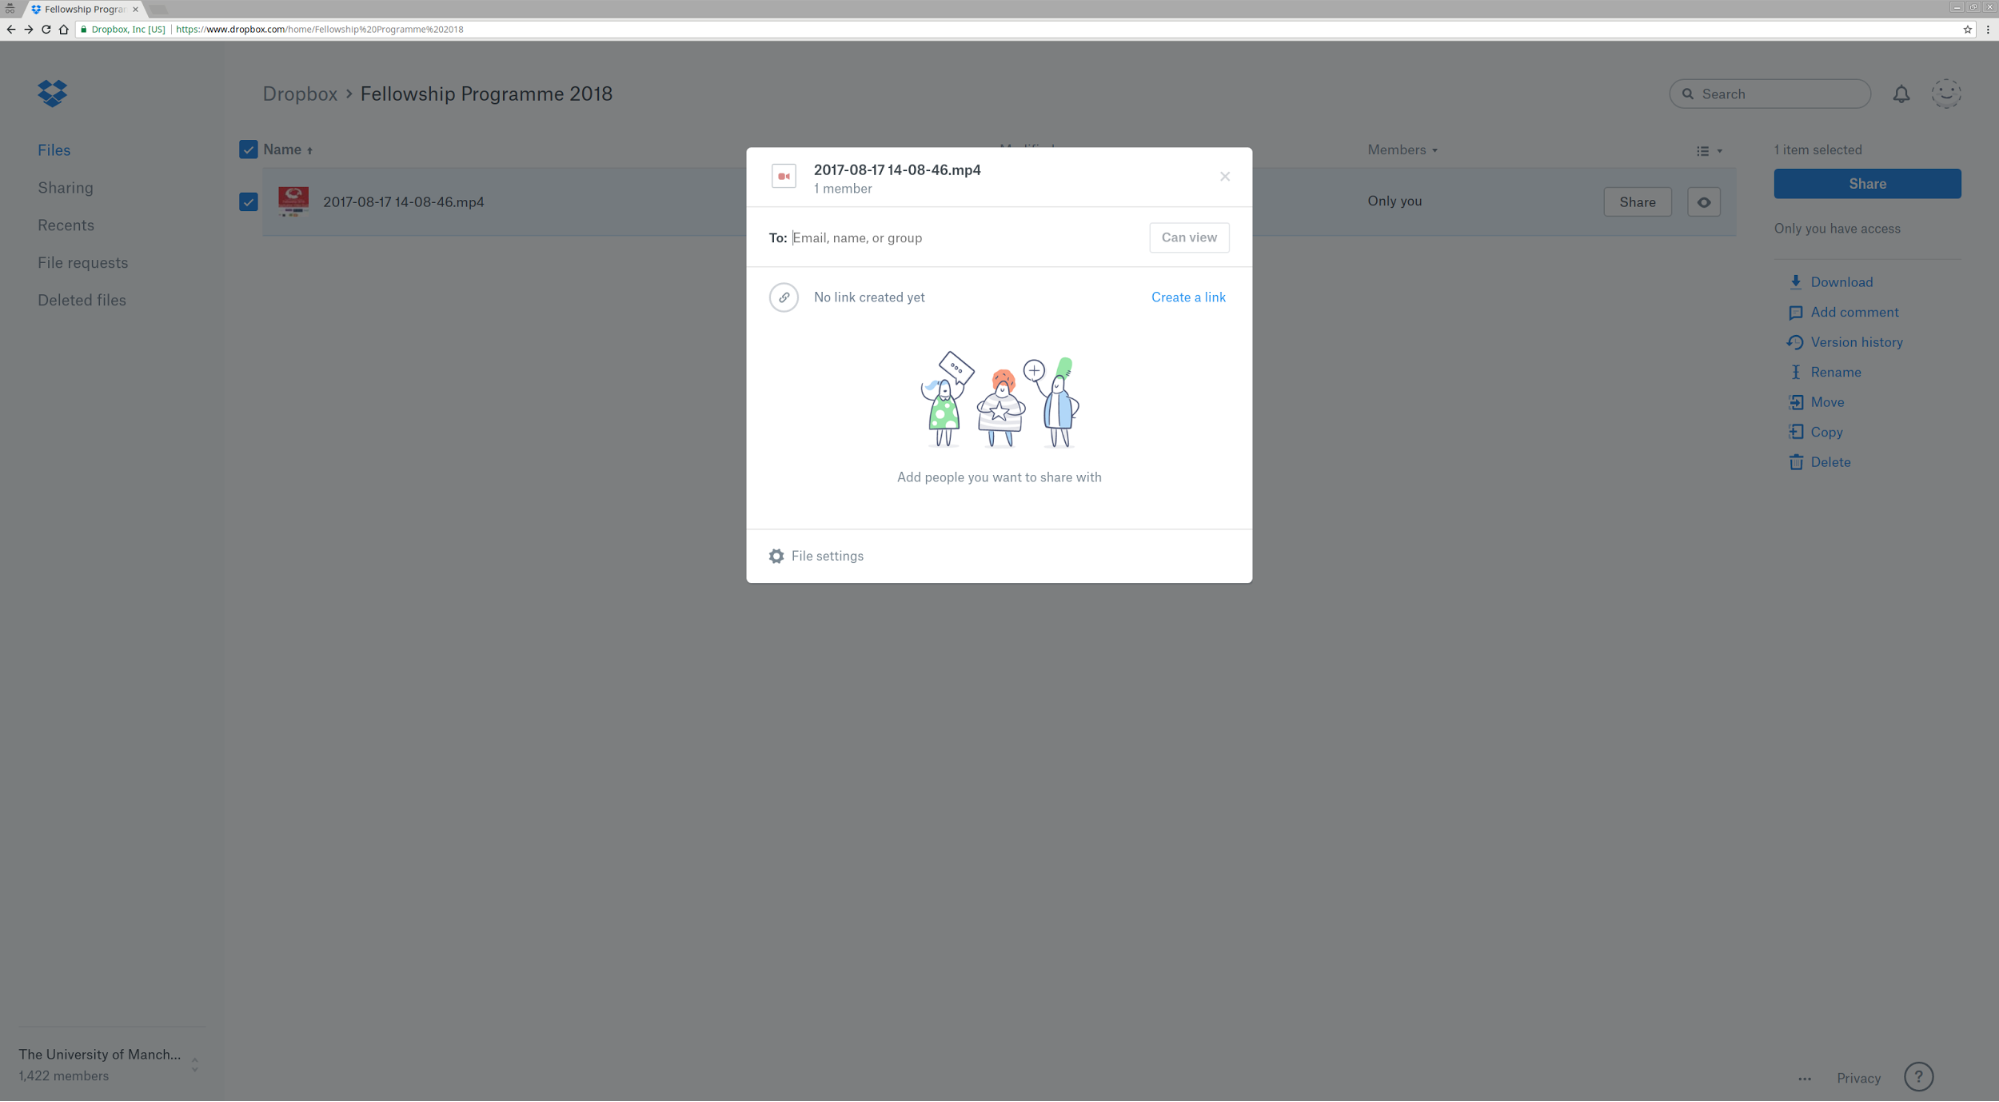
Click on "Create a link".
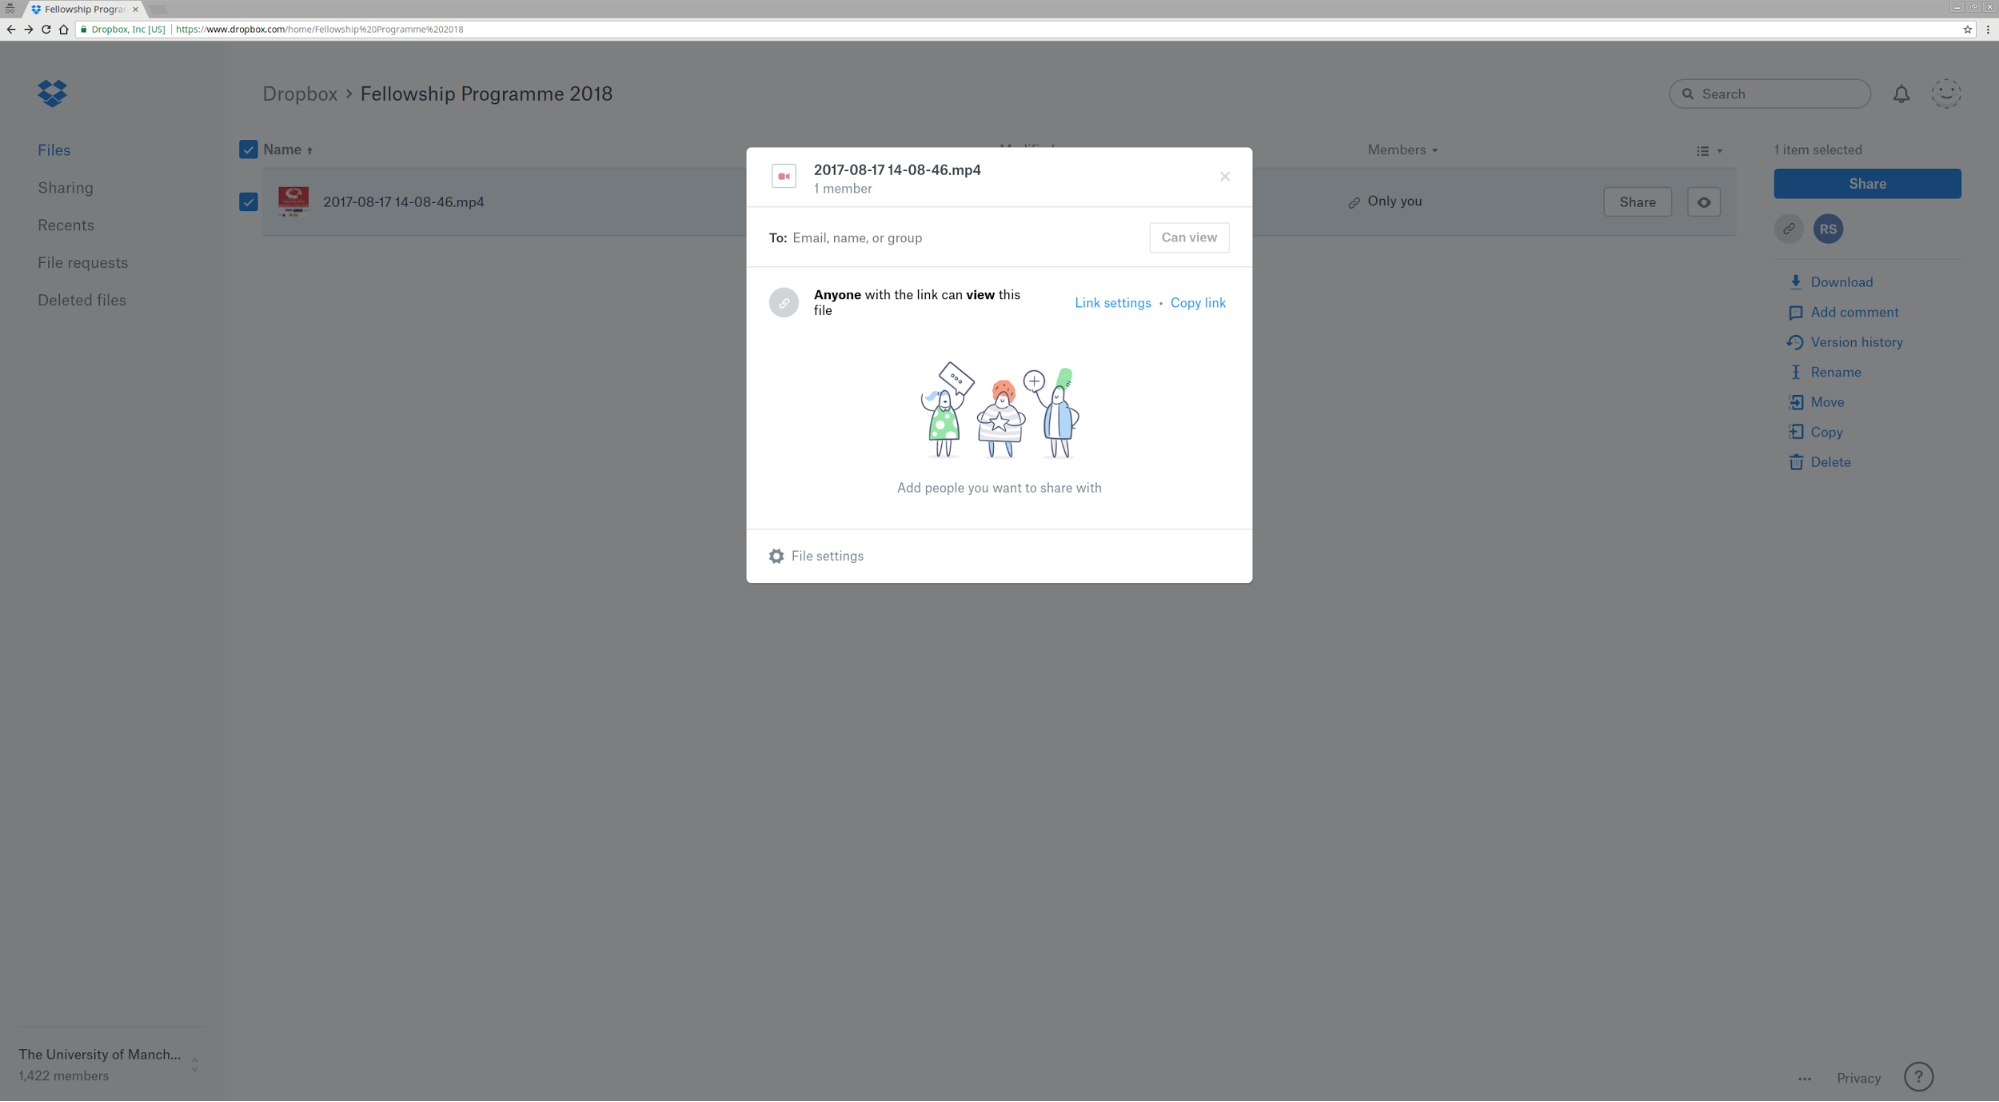
Click on "Copy link" and paste it on your application.
Note: We will append /download/ to the URL provided by you so that curl can download the file.
Back to the Apply to the Fellowship Programme 2023 page